Living shorelines are the preferred approach to shoreline stabilization, but there is no one-size-fits-all method for designing, installing, and maintaining a living shoreline. This can be frustrating and sometimes hard to navigate. The list below breaks the process down into six steps and allows homeowners to make an informed decision on the best management practice for erosion prevention on their property.
If you would like a visual reminder of these six steps as you work on your project, print out our single-page PDF.
Note: many of the links on this web page will take you off of CBF's site.
Step 1: Getting the Lay of the Land
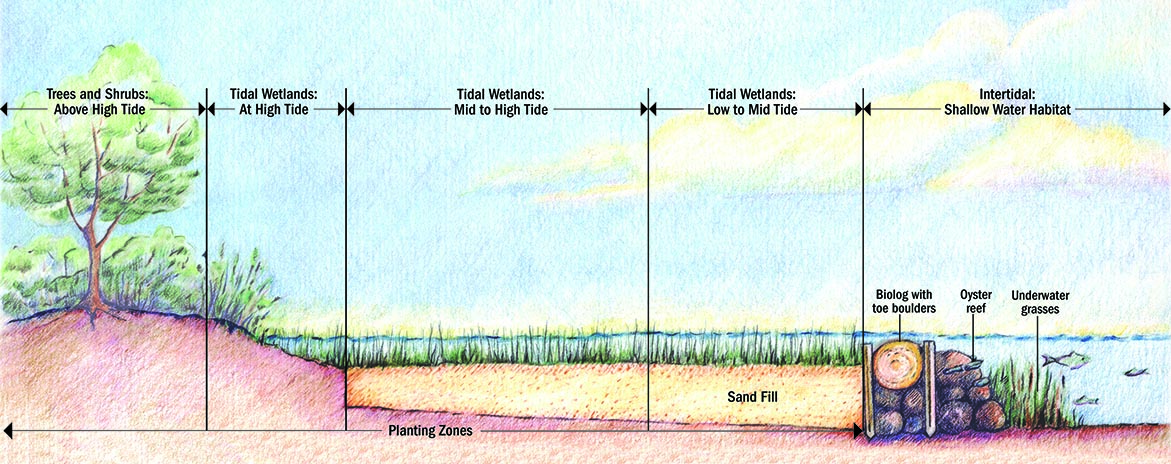
This illustration of an "ideal" living shoreline shows a succession of natural filters, from trees and shrubs above the tide line down to underwater grasses in shallow water, that normally would be found in undisturbed ecosystems.
Terry Coker Peterson
Site Evaluation Worksheet
Knowing your site's specifics is a first step to help understand if a living shoreline may be right for you. Some initial research will reveal both the possibilities and limitations of your site's living shoreline potential. Use our Site Evaluation interactive PDF to help guide you through the initial process.
Before moving forward, we recommend downloading Google Earth Pro.
VIMS CCRM Shoreline Management Map
VIMS Center for Coastal Resources Management (CCRM) has done a lot of research and data collection on the best management practices for shoreline stabilization. They have put all the findings into an interactive map. Instructions on how to access the map are below.
- Go to VIMS Virginia's Coastal Zone Locality Portals and find your area in the list on the left side of the web page.
- Once the locality portal website has downloaded, scroll down the page to “comprehensive map viewer” under Mapping Tools.
- Once the map has loaded, locate the “Map Contents” box.
- Uncheck the “Shoreline” box and scroll down to “Preferred Shoreline BMPS.”
- Click the empty box next to “Living Shoreline BMPS” and “Special Considerations.”
- Use the plus or minus arrow to zoom to your living shoreline.
- Once you have zoomed in, click the colored line and a popup will appear providing you more information on the best management practice for a shoreline stabilization project on that site.
VIMS Decision Support Tool
Use the VIMS Shoreline Decision Support Tool for guidance on the shoreline erosion management strategies appropriate for your setting.
Evaluate your site to determine if only marsh enhancement is needed.
In some cases, sand backfill and bank grading may be needed to ensure proper elevations for plant survival. In other cases, creation and enhancement of fringe marsh without protective structures have the potential to be successful as well! Here are some site conditions to consider:
- The waterway would need to be sheltered with low wave action from either boats or wind.
- In some areas, select pruning of trees is needed to increase sunlight to marsh grasses.
Contact CBF staff member Kati Grigsby at kgrigsby@cbf.org or 757-644-4117 for an assessment.
Evaluate your site to determine if oysters are a suitable component.
Living Shoreline Oyster Reef Suitability
For some sites, oysters and oyster structures can be used to help attenuate wave energy. A viable site for an oyster reef needs to contain these elements:
- Bottom type needs to be hard or sandy (Can you walk on it?).
- Salinity needs to be above 8 ppt.
- Reefs need to be placed into inner-tidal areas below mean low tide.
- A low to medium fetch.
To see if oysters would be a viable option at your location, see our Living Shoreline Oyster Reef Suitability Map for Virginia.
This map is for educational purposes only and if you choose to incorporate oysters into your living shoreline, we recommend speaking to a professional beforehand. There are several oyster professionals and oyster restoration techniques available.
Incorporating Oysters into Living Shorelines
There are many benefits of using oysters as part of a living shoreline.
- Cleaner water
- Erosion mitigation
- Shoreline stabilization
- Habitat creation
- Increased property values
Download Incorporating Oysters Into Living Shorelines for details and specifications about different types of artificial oyster reefs appropriate for living shorelines.
Testing Oyster Reef Materials in the Nansemond River
A pioneering partnership between the Nansemond River Preservation Alliance (NRPA) and Chesapeake Bay Foundation (CBF) will deploy a variety of innovative oyster restoration techniques with the hope that these living shoreline will increase oyster populations and prevent erosion, among other benefits.
Find out more about this incredible project in our interactive story map below.
Step 2: Get Help
Ask for additional advice from non-profits
- Chesapeake Bay Foundation
Projects in the Hampton Roads area
Kati Grigsby: kgrigsbyr@cbf.org - Elizabeth River Project
Projects in the Elizabeth and Lafayette Rivers
Barbara Gavin: BGavin@elizabethriver.org
757-399-7487 - Lynnhaven River NOW
Projects in Virginia Beach
Vince Bowhers: Vince@LRNow.org
757-505-0775 - James River Association
Projects in the James River
Ryan Walk: rwalsh@thejamesriver.org or Emily Hinson: ehinson@thejamesriver.org
Ask for additional advice from government entities
- Local Wetland Board Contacts
Request an initial site visit to evaluate your sites potential for a living shoreline. - Virginia Marine Resources Commission
This list provides a breakdown of local VMRC representatives. - Shoreline Erosion Advisory Service (SEAS)
This is a free resource run by the Virginia Department of Conservation and Recreations to assist private land owners and localities in Virginia with erosion problems.
Mike Vanlandingham: mike.vanlandingham@dcr.virginia.gov
Office: 804-443-5642
Cell: 804-466-2229
or
Aaron Wendt: aaron.wendt@dcr.virginia.gov
Office: 804-443-5642
Cell: 804-296-1701 - Virginia Soil and Water Conservation District
Virginia Conservation Assistance Program
Ask for additional advice from environmental organizations
- Virginia Institute of Marine Sciences (VIMS)
See VIMS handbook for evaluating, designing, and implementing a living shoreline. Have a question for VIMS about your living shoreline? Email: CCRMinfo@vims.edu
Chesapeake Bay Landscape Professionals
There are professionals for hire who can assist you with living shoreline projects, including a contractor (to help you build), an agent (to help you through the process and permitting), and others who can help you design your living shoreline. The Chesapeake Bay Landscape Professional (CBLP) Certification program directory lists over 175 CBLP-certified professionals who bring a wealth of experience to sustainable landscaping projects. You can filter the directory by "living shorelines" to find qualified professionals.
Step 3: Funding Opportunities and Budgeting
These programs will help homeowners pay for a living shoreline:
- Virginia Conservation Assistance Program (VCAP)
Reimburses 75 percent of total costs with a maximum payment of $15,000 per parcel per year for living shorelines to certain property owners within the Chesapeake Bay watershed. Financial assistance is only available to those who live within a Soil and Water Conservation District (SWCD). - Do I Live in a Soil and Water Conservation District?
- Virginia Conservation Assistance Program for Living Shorelines
- Elizabeth River Project
Reimburses 50 percent of cost up to $4,000 for a living shoreline or up to $1,500 for a shoreline buffer for waterfront River Star Homes in Chesapeake, Norfolk, Portsmouth, and the Eastern Branch area of Virginia Beach.
Elizabeth River Project Funding
Programs for private organizations and municipalities:
- National Fish and Wildlife Foundation (NFWF)
NFWF offers a host of grants.
NFWF Grant Application - Stormwater Local Assistance Fund (SLAF)
All Virginia municipalities may apply to this matching grant fund for larger scale projects.
Virginia Clean Water Revolving Loan Fund Program - Virginia Department of Environmental Quality (DEQ)
Low-interest financing is available for the purpose of establishing living shorelines to protect or improve water quality and prevent the pollution of state waters. Contact DEQ for geographic area.
DEQ Loan Program
There are many factors that play into the final cost of a living shoreline. In general, if a living shoreline is non-structural and does not require any bank grading, then the project cost is much less than a hardened shoreline. No matter the cost, it is nice to have an idea for budget purposes. Also, locating the source for your materials and having the material specifications is needed for the permit application. Our Living Shorelines Supplier List can get you started.
Step 4: Permit Application and Submission
We highly recommend getting in touch with your local VMRC and Wetlands Board representative for a pre-application site visit to discuss your site and preliminary plans. Look up your contacts for your locality:
It is important to understand that permit applications and permit approvals take time, no matter what type of shoreline stabilization you are implementing. A permit application for a living shoreline is much more streamlined and less expensive than for a hardened shoreline.
Timelines you should keep in mind:
- Filling out the permit should not take long, but gathering the information needed for the permit may delay the process. On average, you should estimate three to five weeks before the permit is ready for submission.
- Once the permit has been submitted, you should estimate 60 to 90 days for the permit to be approved.
A marine agent or contractor can help you develop a plan and navigate the permitting process. But if you want to do it yourself, there are some important things to know.
To speed permitting and encourage Living Shorelines as the preferred method of coastline management, Virginia created a General Permit for Living Shorelines. If you meet the criteria, your application and processing fees are waived, and the Virginia Marine Resources Commission may issue your permit without a public interest review—which saves you time and money!
There are two categories of “General Permit.”
- Group 1 Permits cover sand fill, fiber logs, fiber mats, shell bags, and temporary grazing protection in tidal wetlands, landward of mean low water to improve the growing conditions for wetland vegetation. The establishment of oysters and ribbed mussels may be incorporated into the project design. These permits are appropriate for living shorelines that are comprised of primarily natural materials, constructed in tidal wetlands landward of mean low water, and located in an area with relatively low fetch (less than 0.5 miles). If approved, Group 1 permits do not require public interest review, notification of adjoining landowners, or a permit fee.
- Group 2 Permits cover a wider range of living shorelines, including those with a more hybrid design (such as sills), and can be constructed in areas with a fetch of up to 1.5 miles. If approved, Group 2 permits do not require public interest review or a permit fee (depending on your locality). Group 2 permits do require you to notify adjoining landowners.
Permit Application
For these permits, all applicants are required to fill out a Joint Permit Application (JPA). Don't worry! Although the application looks long and daunting, you will only have to fill out certain sections. See "Joint Permit Application (JPA)" on the Center for Coastal Resources Management Permit Information page for step-by-step instructions for filling out the permit application. If you have any issues or need additional assistance with the application process, feel free to contact your local VMRC or Wetlands Board staff member.
Permits do require that adjacent landowners be notified of the project to ensure they have no objection.
Permit Submission
Once your permit is ready for submission, email or mail the application to VMRC. Submission instructions are available here (pages 2-3). We strongly encourage you to notify VMRC's habitat division of your submission (757-247-2252) once completed.
Here are some helpful things to keep in mind:
- Once your permit has been submitted, you should see your project submission on the Habitat Division website.
- Tip: copy and save your personal application's URL so you won't have to search for it again.
- Keep in mind that work along the coast and intertidal waterways involves multiple state and federal agencies. Once your permit has been submitted, VMRC then routes your permit application through all the other necessary agencies for approval.
- Typically, the approval process takes 60 to 90 days.
- If any paperwork is missing, site design needs to be adjusted, or location needs to be moved, the local VMRC representative will contact you directly.
- A normal JPA application fee is $495 but if your site qualifies for a Living Shoreline General Permit, that fee is waived. Another benefit to implementing a living shoreline!
Step 5: Build
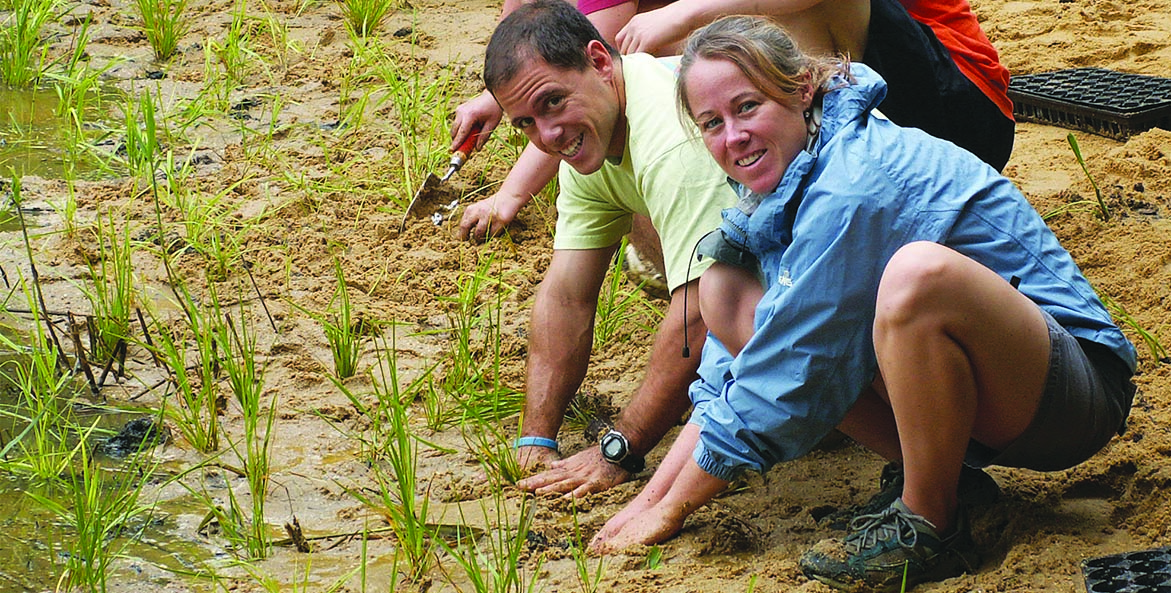
Volunteers plant hundreds of marsh grass plugs (Spartina alterniflora) for a living shoreline.
CBF Staff
If you need volunteers for the construction, reach out to any of these non-profit groups for volunteer planting assistance. The more lead time you give them to recruit volunteers, the better, so plan as far ahead as possible!
- Chesapeake Bay Foundation
Projects in the Hampton Roads area
Kati Grigsby: kgrigsby@cbf.org - Elizabeth River Project
Projects in the Elizabeth and Lafayette Rivers
Barbara Gavin: BGavin@elizabethriver.org
757-399-7487 - Lynnhaven River NOW
Projects in Virginia Beach
Vince Bowhers: Vince@LRNow.org
757-505-0775 - James River Association
Projects in the James River
Ryan Walk: rwalsh@thejamesriver.org or Emily Hinson: ehinson@thejamesriver.org - Nansemond River Preservation Alliance
Projects in Suffolk
Elizabeth Taraski: taraski.nrpa@gmail.com
757-745-7447
If you have a contractor, they will most likely be the one purchasing the materials needed for your project. If needed, download the Living Shorelines Supplier List.
Like most outdoor projects, how soon the project gets completed is based on weather conditions. However, tide also needs to be considered when installing a living shoreline. Ideally living shorelines are constructed at low tides to allow for ample access to the site. The Center for Coastal Resourcs Management website has these design guidelines for planting.
Hint: Keep a narrow unplanted path to the water for beach access.
To ensure your living shoreline does not become an all-you-can-eat buffet for ducks and geese, goose netting, a three- to four-foot tall mesh enclosure, needs to be installed immediately after grass planting. This is just for the first year to allow for grasses to fully develop.
Don't forget to take before, during, and after pictures to document the progress.
Step 6: Living With Your Living Shoreline
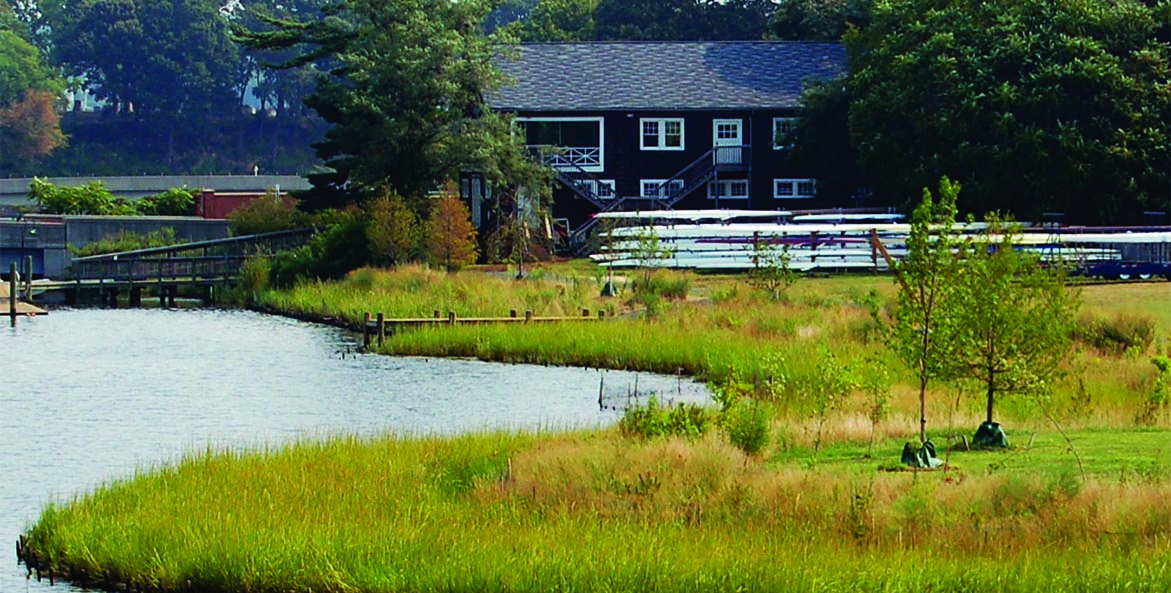
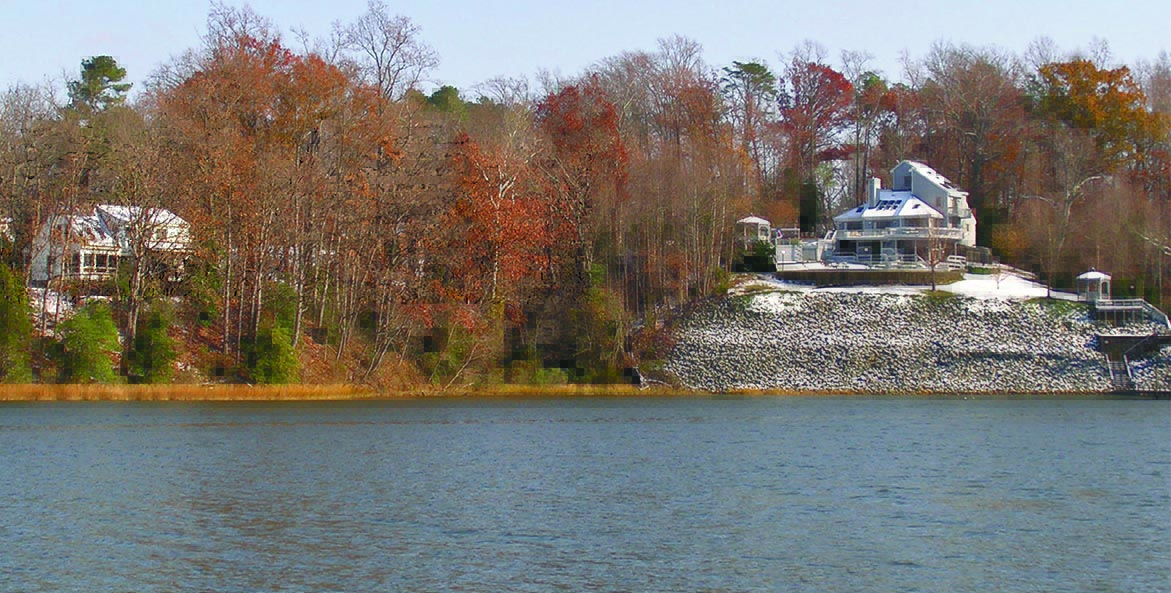
A living shoreline of marsh grasses fronted by a biolog works well in these calm cove waters.
Rob Schnabel/CBF Staff
Maintaining your living shoreline is an on-going process.
The first growing season is a critical time for plant development. Here are some things to keep an eye out for during this time:
- Ensure goose netting is still properly covering all of your grass planting area.
- Remove large debris such as logs, algae mats, and trash, periodically to protect wetland plants from smothering.
- Keep an eye out for non-native invasive plants such as phragmites, english ivy, and other invasive species to ensure that they don't take over your planting areas. Control or treat as needed and replace them with native wetland plants and shrubs.
- Do a site inspection, particularly after storm events, to ensure that damage and repair doesn't need to be done to plants or materials. Replacing some planting may be necessary.
- Be aware as your plants are getting established that full sun is needed for some marsh grasses so be cognizant of potential shading.
Educate your neighbors about living shorelines.
Educate your neighbors and community about why you constructed a living shoreline and what the benefits are to your local watershed and the Bay. The more connected these shorelines are, the better they function.
Enjoy your beautiful shoreline and the wildlife it will attract!
For more information or if you see something that needs to be added to our website, contact Kati Grigsby at kgrigsby@cbf.org.